You all know how I adore these elements: burlap, plants, glass, terrariums, woodland, twine, stumps, mercury glass, industrial, and faux bois. Just a few things, really. 🙂
When decorating my mantle this year, I found as set of chipboard tree cones at Hobby Lobby for half off, less than $10 for both. I had been eyeing some that were already decorated–they come with feathers, or glitter, or all sorts of cuteness…but none were quite “me” at quite the right price.
So, I picked the set up, thinking I’d cover them somehow. But when I came home, I looked around at all there was to do, and all of a sudden, crafting just seemed a little too time consuming to me.
But, because I felt daunted with no pattern to look at, I’ve created a free printable for you to use as a stencil, template, or just as a pattern to copy. Click on the image below for your FREE FAUX BOIS PRINTABLE…
The only tricky thing about painting these is just to make sure you do half, let dry, then do the other half, so as to not get your fingers on wet paint! Otherwise, it was a pretty simple project that only took an hour or so, total. Christmas decor need not be perfect to be welcoming and wonderful in your home. Sticking to a budget forces ingenuity and sometimes, become the most creative ideas. Enjoy!
(And, you may have read on IG that we are a Santa-free zone at this house, but we still love hanging stockings for little treats. You can read more about my handmade stockings here.)
I’m still wearing paint on my fingers and you might find a spot or two where I may have missed some wax on my arm. I’ve been re-working old furniture and giving new life to pieces that have otherwise suffered much wear and tear from years of life with boys. I told you last week that I would be trying out Annie Sloan Chalk Paint over the weekend, after hearing all sorts of amazing claims and reviews of the product: No sanding. No priming. No perfection needed. I was all ears. (And if you follow me on Instagram, you’ve been catching sneak peeks…)
And, even though the price per quart is expensive (around $40), the paint goes FAR, covers well, and is versatile as a thick paint with body to it, or thinned out as a wash. So…that’s why I went for it. And, I’m so glad I did.
Here’s all I did in a weekend:
The biggest project was our dining table. It was a huge Ethan Allen table we’ve had for almost 10 years. It was beautifully veneered with Ash over solid wood, but after years of use and a certain mishap with a flaming dry erase marker, the table was sad and worn out.
We painted the entire thing in Pure White. Two coats covered for the most part, but I had to go back in some spots. The thing I learned was that it really wasn’t necessary to paint “evenly” or in perfect strokes. In fact, it looked better if I didn’t, because of the beauty that the dark wax brought out in the markings.
The process I used: Paint several coats (no sanding and priming!), wax lightly with clear wax, then dark wax on edges and textured areas–using clear wax immediately after to remove surface dark wax and leaving the rest in grooves. Wait 24 hours. Sand and distress edges and areas of natural wear. Buff, and wax again. Wait 24 hours. Then buff. Waxing and buffing is not for wimps. I got quite a workout, I’ll admit.
I love how it turned out, though. You really must come over and feel it and enjoy the nuances of the finish. It’s perfectly shabby chic while staying sleek and protected in finish.
I painted the old kitchen cart we used to use as an island. Again, no sanding, no priming. I painted the entire piece Aubusson Blue. I went through the whole process with this piece…and ended up doing it two more times. I know I have issues…
It just wasn’t quite “teal” enough, though it wasn’t straight up teal that I was after. Yup, issues, I tell you! I got a second blue–Provencal and layered over the Aubusson in a farmhouse-y wash by using a damp rag to wash over certain portions of the top coat of paint. Not really me…
I was honestly getting a little discouraged…and tired, as you can imagine! Finally, I chose to mix the two (I don’t know what the proportions were…) and painted over the whole thing with my new mixture. It was a lot of effort for a shade or two different. But, for me…it was worth it.
I’m still looking for the perfect brass hardware for the doors…
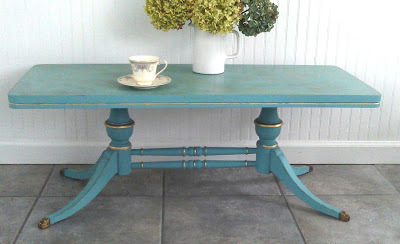
I then went on to paint my old Craigslist coffee table. I was ready for a change, and just reveled at the idea of making the most of all that antique carving and decorative trim. I didn’t anticipate, however, how girly and delicate it would feel once I painted it; and, I didn’t like it much.
I considered painting a moroccan pattern on top, like my bathroom wall, to paint a ginormous flower on it (surprise surprise), or to replace the fabric I used to have under the glass on top. Nothing seemed quite right, until I decided to paint chalkboard paint on top; it gave the table a quirkier, edgier feel.
And now, after a few tries, it says exactly what I want it to say, and feels exactly the way I want it to feel. quirky, but nottoo quirky.
I even gave the lockers a wash of pure white and wax. SO MUCH EASIER than spray painting it!
I’ve had fun freshening things up. Having lovely furniture can never be the end goal, no matter how satisfying it may be to make our homes pretty. It’s never truly satisfying until it’s shared. Praise Him for the joy of creativity but the opportunity to welcome others to stay awhile.
Guess what I will be doing this weekend? Lord willing, I will be giving Annie Sloan Chalk Paint a try on several pieces of old furniture! Have you heard of it? Supposedly, it sticks to any surface without sanding or priming, and is the perfect paint for a distressed, shabby chic look. I would say that I have an eclectic style that incorporates industrial chic with a little farmhouse. I’m not up for heavy distressing…just a lived in feel for some pieces that are otherwise looking dull and lifeless.
I’m planning on using Pure White (but questioning it, and thinking about it Old White), Ambusson Blue, and French Linen (that I plan to mix with white). I plan to use clear wax on everything, and lightly distressing all pieces.
Here are some pieces I’m planning to paint:
These two craigslist finds that I’ve had FOREVER…what color?
This was our kitchen island before we did the kitchen remodel…blue maybe?
Two World Market bookshelves I’ve turned into a coffee bar…a lighter warm gray maybe?!?
…and, don’t know if I’ll be brave enough to paint my armoire. I do love it as is. Oh–and the bull skull was just begging me to take him home from the shop next to the paint store. $50. It’s worth it to me, at least. 🙂
I’ll be pinning more examples and ideas on Pinterest, so follow my board there!
The wonderful thing about using Scripture in chalkboard art is that you won’t really ever tire of reading it. How does God’s Word ever get old? It truly is living and active…and feeds our souls like no sentiment, platitude, or pithy saying can.
I finally redid the chalkboard above the coffee bar. You may recall my first attempt at a large-scale chalkboard with a freehand chalk drawing of Lamentations 3:22-23. If you’ve been following me on Instagram or Facebook, you may know that I’ve been chewing on Psalm 118. I’ve been thinking on how God has freed us from the fear of man, how he’s worthy of our trust, and how we can rejoice in our salvation…each and every day. If you haven’t read Psalm 118 lately, I encourage you to do so!
I’m pretty new to the whole printable thing, and this one is based off a photograph of the board since I can’t actually scan in this artwork…but I think the quality will be good enough for an 8×10. By no mean is it pro, but if it blesses you, I made it into a printable for your encouragement! (Click on image below for the PDF.)
So, I’m truly learning as I go with this chalkboard art thing It’s so much harder than it looks. (I’ve said it before and I’ll say it again!) I usually take a stab at it, hate it, then wash the entire board off…
I’m all about doing things freehand, and I hate to map out, grid, and plan, but with chalkboard art, it certainly helps to at least make some tiny markings for leveling. (I don’t draw out a grid because I’m too lazy to go back and clean it all off.) I also experimented with this fancy chalk I purchased recently. It’s actually not chalk at all; it’s soapstone.
Some thoughts on each…
Chalk: cheap, makes super bright white markings when applied wet, good shape of calligraphic fonts, soft and chips easily, leaves a lot of dust, consumed quickly.
Soapstone: expensive, doesn’t change when wet, can be “sharpened,” doesn’t chip or break, great for detail, not so great for large bold markings, perfect for chalkboard labels and identification, can scratch chalkboard if too much pressure is applied, consumed less quickly.
(The kind that I purchased was similar to this one, but you can purchase other varieties on Amazon here.)
The art on the left was done with regular chalk, with the exception of the drawings of the wheat throughout. The “working area” on the right was done all with the soapstone– so easy to write with!
BTW…do you see my new Keurig? 🙂 I’ve always wanted one, and the Lord was so kind as to give me an opportunity to write a sponsored post that included a free one sent to me! How gracious is our God…providing for our needs AND our wants.
And, today and everyday, I’m reminded that for all that he is and all that he has done, I WILL rejoice and be glad in it. Have a wonderful weekend, friends, and thanks for joining me here!
Chalkboard art is everywhere. It’s super charming, and so simple to create. Well…okay…let me back up. Conceptually, it’s so easy, but in reality, chalkboard art requires lots of practice and a steady hand. If you are new to chalkboard art, here are some helpful how-to tips. And, for inspiration, these are my favorite chalkboard artists (you can buy their prints on etsy here and here!)
Remember when I tried my hand at it? That was NOT a 15 minute project…
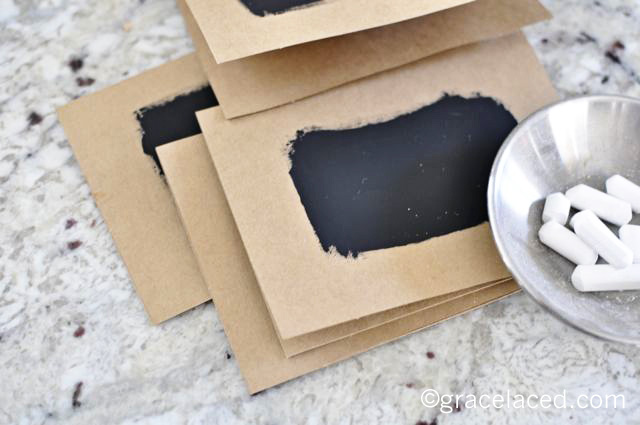
I posted about the amazing baby shower thrown in my honor on Tuesday. As a hostess gift for each of the 9 hostesses of my recent baby shower for Number 6, I needed a personal, but affordable gift. I decided to make them each a set of personalized blank notecards with their initials and unique sentiments. There are so many ways you can use this idea. It’s pretty simple…Here’s how you can make your own:
Supplies
blank note cards and matching envelopes (I purchased brown craft paper cards from Hobby Lobby)
black acrylic craft paint
1 inch wide sponge applicator brush
chalk
fixative spray (art supply) or aerosol hairspray
1. With sponge applicator, paint a rectangle “chalkboard” onto the front of your notecard. It really need not be perfect–it’s better if it’s not! Let it dry.
2. With chalk, and font examples, personalize each chalkboard card with an initial, sentiment, or message. Take care not to smear. If you mess up, you can start over by “erasing” with a damp paper towel. (Tip: it helps to soak the chalk in water first.)
3. Once paint is dry and chalk is drawn, set the chalk with a fine mist of fixative spray, or in my case, aerosol hairspray since it’s what I had. (Tip: If you use aerosol hairspray, make sure you are giving it a fine mist, or you will see the hairspray spots.) The chalk will first seem to disappear, then reappear when drying. Let dry completely. Now your chalk won’t smear!
4. Carefully stack your notecards and press between heavy books overnight.
5. Bind notecards and envelopes together with ribbon or string for a lovely gift set!
Let me know if you try this simple project. Wouldn’t it be cute as a blank gift set kit with chalk included? Or as thank you cards? The possibilities are endless!
Sometimes it’s all in the details. Details don’t have to be expensive, fancy, or extravagant. It’s most satisfying when you use what you have to create something special.
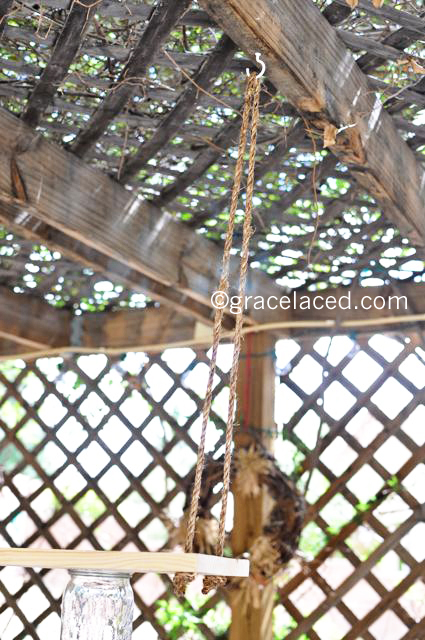
I recently dressed up the entry to my potager for a party I hosted in the garden. Don’t they seem to just say, “Welcome!”
You know I’ve been obsessed with all things mason jar for a long time. I’ve used them to light the backyard and for drinking iced coffee, and now, I’ve finally turned them into a light fixture for the arbor! I recently held a birthday party in the garden, which provided the perfect excuse to complete a DIY lighting project I had seen here and here. It’s a fairly simple project, unlike the electrically wired mason jar chandelier I had hoped to make for the dining room (and decided against in favor of a happy marriage. 🙂 ). You can do it in a day, so give it a try!
Mason Jar Chandelier
You will need:
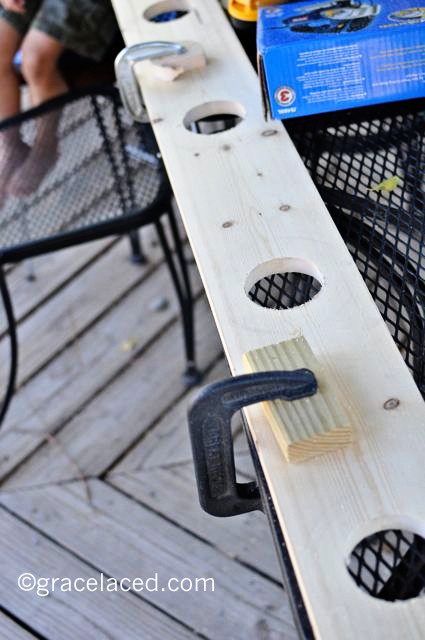
One 1″ x 6′ piece of pine a drill a jigsaw a compass 4 pint sized mason jars with lids jute rope acrylic caulk 4 votive candles (I used large tealights from IKEA) 2 hooks for hanging
Start by cutting your pine to the length you would like your overall chandelier. Space the mason jars out evenly, and mark the center point where each jar will be place. You can trace the lid, but we chose to use a compass to measure and draw the circumference of the smaller side of the tapered lid. Drill a hole at the center point, then cut along the circumference with your jigsaw. Keep in mind the curf of your blade. (Test on scrap metal if needed…you want your ring of your lid to fit in the hole you cut!)
Mason Jar Chandelier
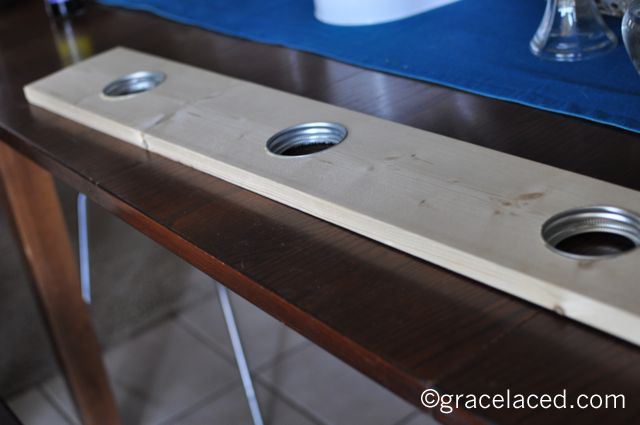
Apply a small bead of acrylic caulk around the outer edge of the lid, and press into the prepared openings. Clean excess with a dry rag. Let dry according to caulk instructions on tube. It should be ready in a few hours.
Mason Jar Chandelier
Drill a hole (the same diameter as the rope you are using) at each of the corners.
Mason Jar Chandelier
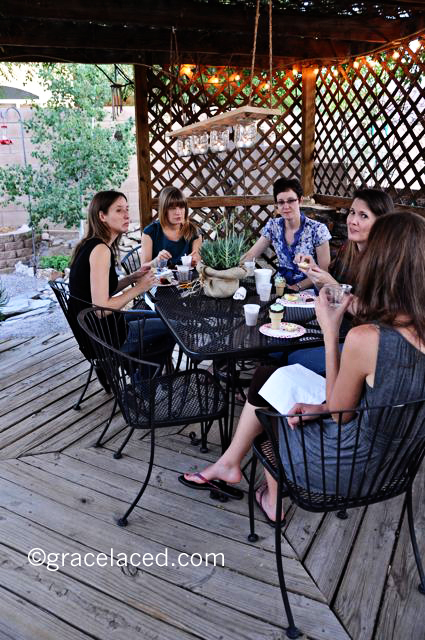
Measure the distance you want your chandelier to hang, double the length and add about 6 inches. Cut two lengths of that measurement. Thread each end each length of rope through the pair of holes on the ends of the chandelier. Knot the ends securely underneath the board (on the side with the lid opening of course…) Install hooks for hanging…
Mason Jar Chandelier
…and attach your mason jars. It helps to have your candles already placed inside!
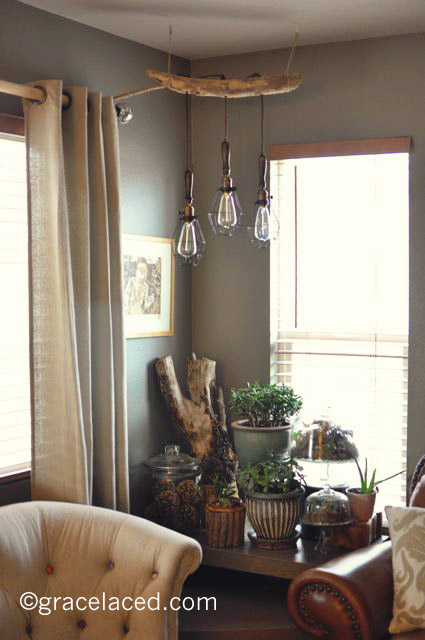
I simply can’t buy anything full price…or even half off. But, when caged pendant lights go 75% off at Anthropologie…I’m in! I really do feel thankful when I find a deal. It’s always a little reminder that the Lord is in the small things too. You know I’m always tinkering with the house, and making little changes that make a big difference in the mood and feel of my home. This was one such project.
cage lights3
The Preacher drilled three holes into a piece of driftwood I had for decor, and disassembled each pendant and reassembled them after threading the wire through the holes. Brilliant, I know. I’m the ideas, but he’s the know-how for sure! Once reassembled and adjusted to the right length, each cord is knotted on the other side of the driftwood to hold in place.
cage lights2
The driftwood is attached to the ceiling via hooks and jute string. Jute also came in handy when wrapping up the three separate cords that lead back down to the power source. (We chose not to wire it in so that there would be the flexibility to use it elsewhere in the future.)
cage lights1
My favorite things about this project is that it brought in an unexpected element of a piece of driftwood suspended from the ceiling. This idea can really be used for any pendant light fixtures, and with any piece of wood or interesting object that can be drilled and suspended (think platters, baskets, reclaimed wood…)! Hope that gets your creative juices going!
Christmas is just two weeks away, but it isn’t too late to bring a little handmade to your Christmas list. I’ve been on the receiving end of such significant creations, as well as the giving of lovingly handmade. Regardless of what side you are on this Christmas, handmade just feels lovely, doesn’t it?
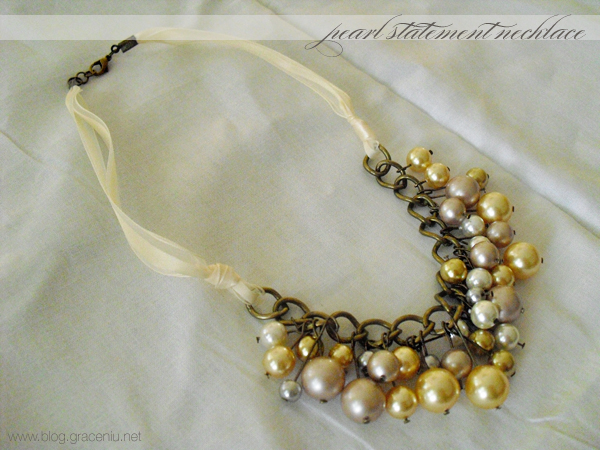
My talented cousin, Grace, is here today to share a fabulous tutorial with you for a necklace that would make any girl swoon.
DIY Pearl statement necklace
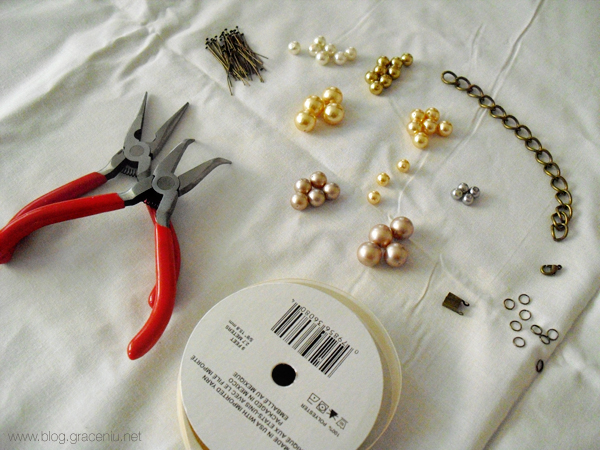
the pearl statement necklace tutorial
grab your jewelry-making supplies and get ready to craft this gorgeous pearl necklace!
if you don’t have any, grab a friend and split the materials, because the jewelry findings usually come in large quantities!
+ your choice of ribbon (i used 1/2″ cream colored ribbon)
+ about 40 antique bronze finish headpins at 35-40mm in length (here or here)
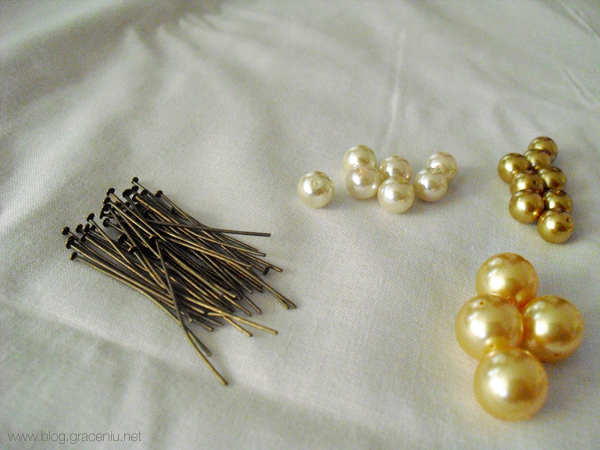
+ pearls in various sizes and colors (here) — i used the swarovski pearls in gold & powder almond, and also a few i bought from online and the craft store
+ about a 6-7 inch length of antique bronze chain (here) — make sure the links are large enough where you can hang your pearls from them
[1] take a pearl and insert a headpin through the holes, as shown.
[2] then take one of your jewelry pliers (whichever you feel most comfortable using, i alternate between the bent-nose pliers and the needlenose pliers) and start shaping the open end of the headpin into a shepherd’s hook shape, or the shape of your closet hanger, if that helps!
[3] your headpin should look like this. don’t worry if it’s not perfectly shaped, we just need to get it into this shape to prepare to hook it onto one of the chain links.
[4] hook your pearl & headpin onto one of the chain links and use your pliers to close up the hook so that the end of the headpin meets the section where your hook bends backwards. you’re basically looping the headpin around the chain link.
[5] grab another pearl and headpin and repeat the process. to vary the lengths of your headpins to create visual interest, you can use wire cutters to trim your headpins. some pliers come with a built-in wire cutter (mine is in the middle of my pliers), but if not, you can always get a separate one.
[6] continue adding pearls in the same way, randomly. a helpful tip is to scatter the bigger pearls closer to the middle of the necklace, and just one or two bigger ones near the ends. it helps if you put the pearl on the headpin and then hold it up to your work to envision where you want to put it before you actually put it on. i am choosing to keep the last link on each end empty, to leave room for the ribbon later on.
[7] don’t feel forced to use all the pearls and headpins you have, or alternatively, don’t feel limited to only use a certain amount. continue adding until you are satisfied with how it looks. mine turned out like this!
[8] before cutting your ribbon, hold your pearl-filled chain up to your neck and decide how high/low you would like to wear it. measure the length of the distance from the end of one side of the chain to the back of your neck. double that, add an extra 1/2 inch for the knot, and cut two pieces of ribbon that length.
[9] take one piece of ribbon and thread one end through the empty link on one end of your chain. make both ends of the ribbon meet, and tie a simple overhand knot, making sure that the knot is secured near the actual chain. you should have two long, open ends of ribbon. repeat with the other ribbon on the other side of the chain.
[10] take one of your ribbon clamps and open it up a little so that the ribbon will be able to fit inside. this clamp is going to get folded over your ribbon ends so that they don’t fray, and so that it can connect to your clasp. use your pliers if necessary.
[11] take both your ribbon ends together and fold the ends in half so that it’s easier for them to fit into the ribbon clamp. wedge the ribbon ends inside the clamp (you can use your needlenose pliers to push the ribbon ends in, i just couldn’t because i was taking pictures with my right hand!)
[12] fold one side of the clamp over the ribbon ends (use your pliers to help you), and then making sure the ribbon is mostly covered by the first flap of the clamp, go ahead and fold the second flap over. your ribbon ends should now be secured inside the clamp!
[13] repeat the process on the other side, so that you have two clamps, one on each end of your necklace.
[14] take your pliers and a jump ring, and open the jump ring.
[15] hook the jump ring into the small hole on the ribbon clamp.
[16] before closing the jump ring, slip the lobster clasp onto the same jump ring, and then use your pliers to close the ring.
[17] repeat the same process on the other ribbon clamp end, but instead of putting another lobster clasp on, add a few extra jump rings so that you can adjust the length of your necklace if needed.
you’re finished! enjoy your new necklace that you can be proud to tell people you made yourself, and watch the compliments roll in! 🙂
***************************************
Thank you so much for sharing your talents here today, Grace! Visit Grace at her fashion and design blog.
It’s humorous; when guests visit my home these days, we make our way to the bathroom first…even before a cup of tea is served! I will not lie, I L-O-V-E my new bathroom. It really reflects my style: a little vintage, a bit o’modern, a dose of rustic, a tad unexpected, just enough feminine, and a whole bunch of casual elegance. (Who am I kidding! I would better describe myself as indecisive!)
Anyway…here it is! The pictures don’t do it justice since there’s no natural light in that bath. I’m so proud of it, though,and so thankful for my sweet Preacher who worked some really late nights to get our DIY project put together!
My favorite part of the bath remodel is definitely the vanity. The Preacher and I painstakingly searched out this antique treadle sewing machine base, and created a knotty pine top for the vessel sink. I think the distressed finish ultimately worked out for this space, don’t you?
After the travertine and pebble floor was sealed, all the rich colors of the natural stone came out. I love how the pebbles look like a bath mat, but hide all the traffic!
After much inspiration on Pinterest, I decided to stencil the wall. You will recall that this was not truly a stencil, as much as a template I traced, then painted with a brush. Don’t look too closely–the lines are definitely not perfectly even! The color was chosen because it was in the reject/clearance section I came upon at Walmart. We always get Behr paint from Home Depot, but this little pint just called out to me, and I went with it. The color is Native Turquoise from Better Homes and Gardens.
And…how about $10 for a light fixture! This little chandelier was a pink and white chandy I purchased on clearance at Target two children ago, when I was convinced I’d have a baby girl…sooner or later. It was still sitting in my closet, two children later, and spray painted buttery yellow–fit perfectly in this little space. A pop of whimsy and bold color.
The framed print on the ledge is also a holdover from my little-girl-room-saving stash.
Vessel sink: Lowe’s Faucet: Home Depot Framed mirror: World Market (coupons come in the mail!) Potted Rose: my own (from 10 years ago!) Bath fixtures: Costco Pine for top: Lowe’s Sewing machine base: local antique shop Tile: ASI tile Chandelier: Target (from years ago), repainted Soap dispenser: Target Wall Paint: Silver Drop by Behr Stencil Paint: Native Turquoise by Better Homes and Gardens
All this bathroom needs is a window that let’s in breeze and some bright natural light. Thankful for how it turned out anyway!
Thank you for visiting my home…even if it was my bathroom! 🙂